How to - Ezlo WIFI Device Generator Plugin - IP device or IFTTT Webhooks or anything else

You can use the new Ezlo “WIFI Device Generator” plugin to create virtual devices like virtual switches to send ON / OFF HTTP commands to IP devices and applications and services on your LAN and also to online services like IFTTT Webhooks (Maker Event).

Some examples might be for controlling local Shelly and Sonoff devices (Although there is now also a new plugin for Sonoff devices in the Marketplace). For controlling IP camera settings, or sending HTTP commands to Node-Red or to any device, service or application that supports receiving HTTP control commands really.

In this example I will be looking at IFTTT webhooks to start applets running on my IFTTT account. I have a consumer grade Ezviz PTZ indoor camera and it has a privacy mode that covers or un-covers the cameras lens.

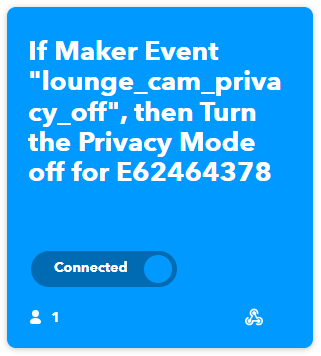
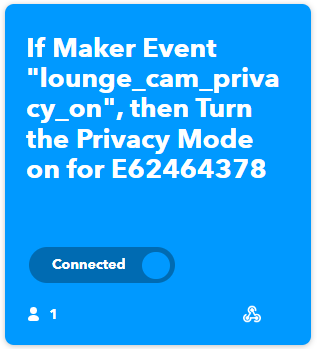
So I linked my IFTTT account with the Ezviz service and setup two applets to turn this privacy mode ON or OFF.

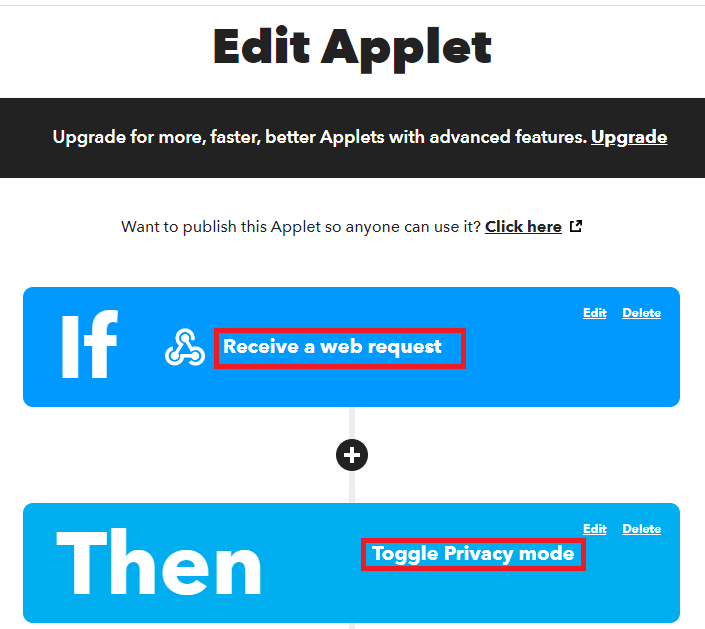
I won’t go into full details of how to setup IFTTT Webhooks, but here are some screen shots for my two applets. You can also read the Webhooks FAQ For More Info.

image image

The Event name you enter, is what ends up being part of the HTTP request URL, see my example commands below.

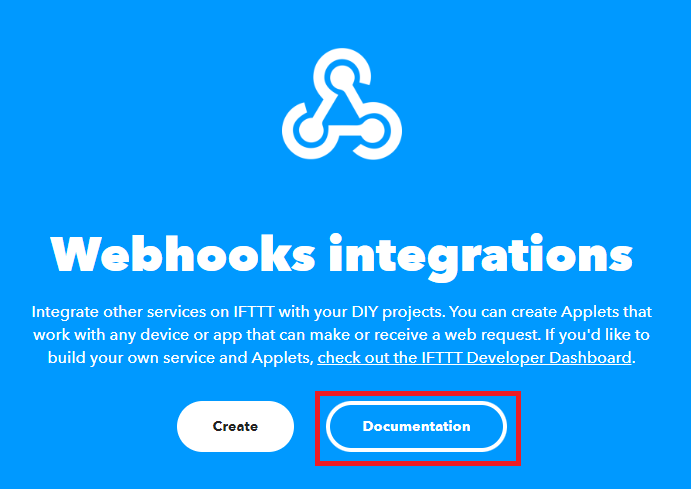
Where do I find my Webhooks key?

Head to the Webhooks service page and click Documentation.

You will then see a page like this and you need to copy your key and make a note of it for later. (Not my real key).

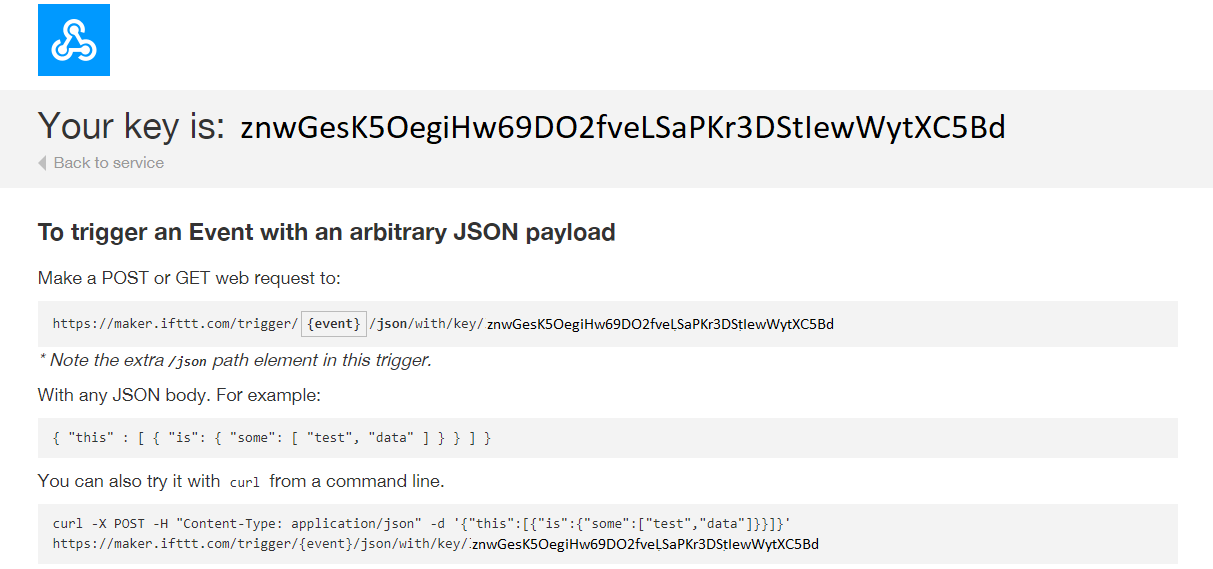
With your key and the event names you created for your Webhooks “IF” you can then create your HTTP Request URLs.

My On command to run the applet

http://maker.ifttt.com/trigger/lounge_cam_privacy_on/with/key/znwGesK5OegiHw69DO2fveLSaPKr3DStIewWytXC5Bd

My Off command to run the applet

http://maker.ifttt.com/trigger/lounge_cam_privacy_off/with/key/znwGesK5OegiHw69DO2fveLSaPKr3DStIewWytXC5Bd

Note the WIFI Device Generator plugin doesn’t currently support HTTPS I don’t think.

Now you have the HTTP commands that will be sent to IFTTT you can start creating your virtual switch device on your Ezlo hub.

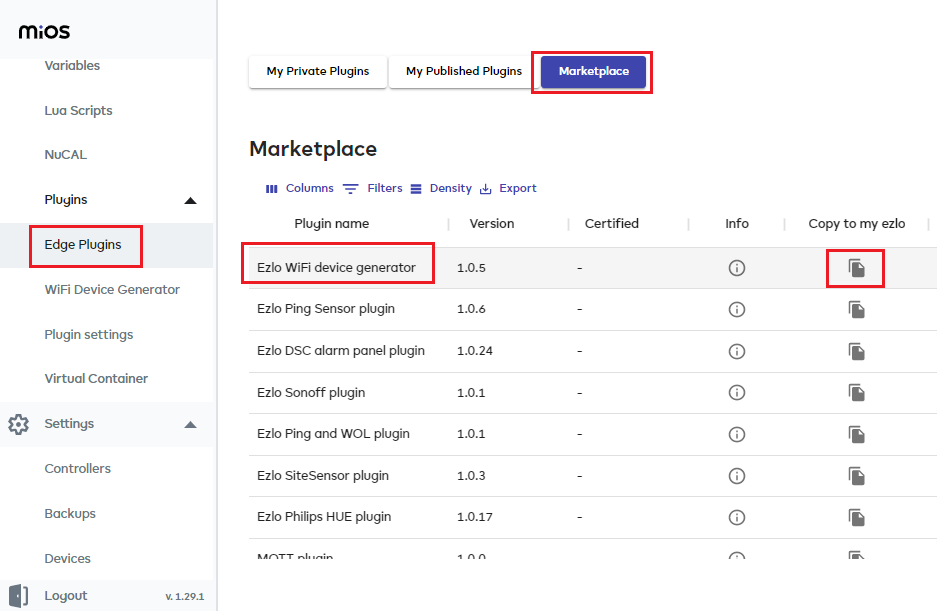
If you haven’t installed the WIFI Device Generator plugin on to your Ezlo controller yet, then you will need to go to the Marketplace and Copy it down to your My Private Plugins area first.

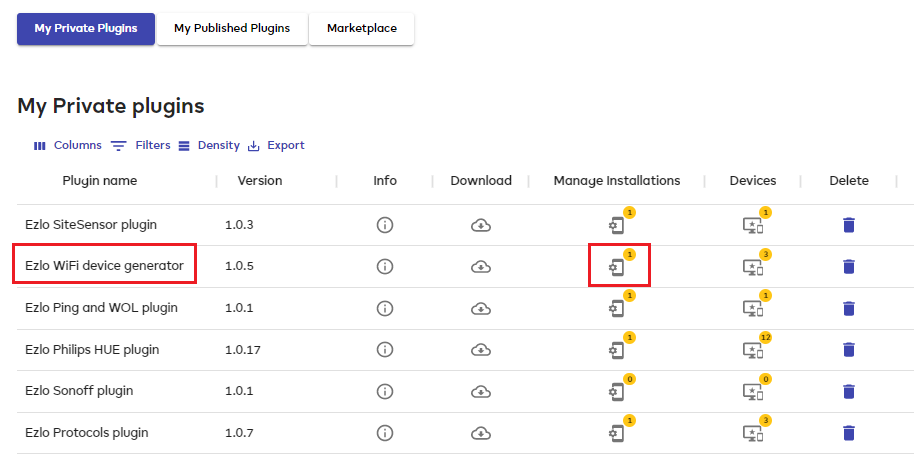
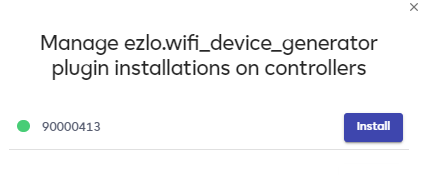
Then in your My Private Plugins area find the WIFI Device Generator plugin and press the “Manage Installations” button next to it.

Click the “Install” button next to your controller.

image

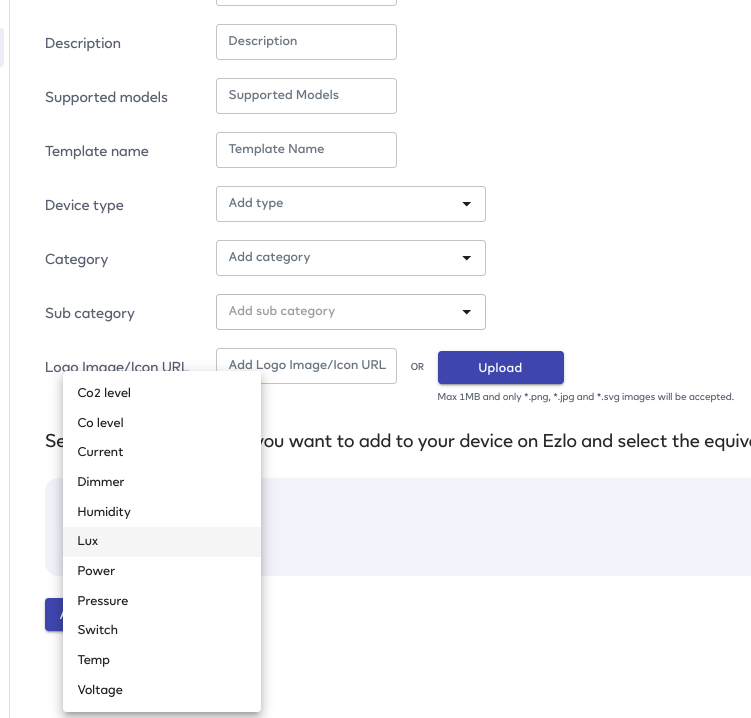
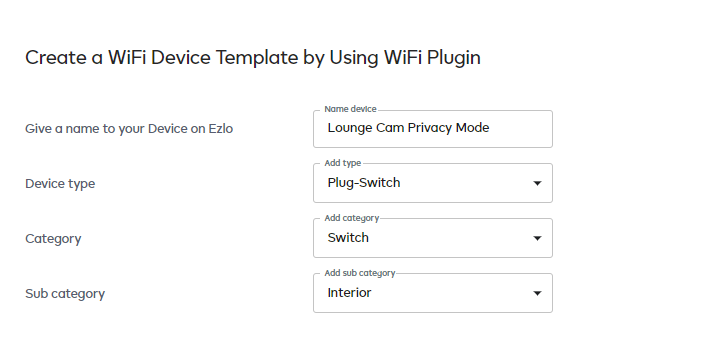
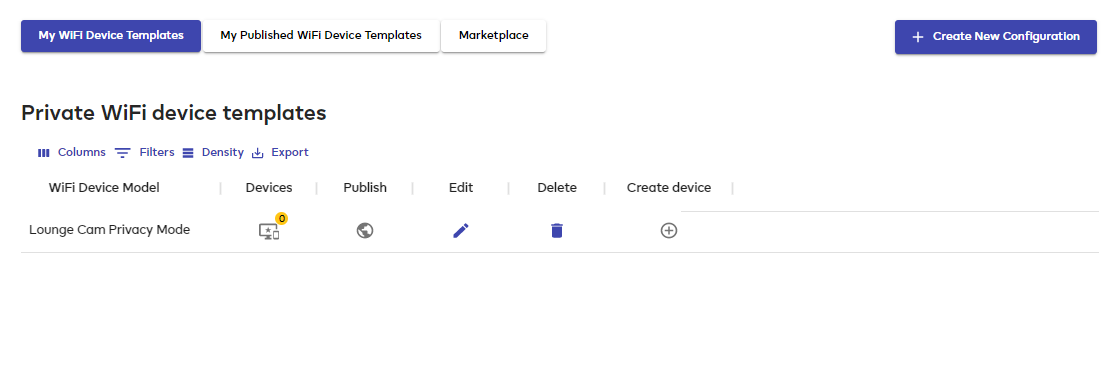
On the main menu on the left you can select the “WIFI Device Generator” and you should see a page like this, press the “Create New Configuration” button.

Give your template a name, for an ON / OFF switch select the following:

Device Type = Plug-switch
Category = Switch
Sub Category = Interior

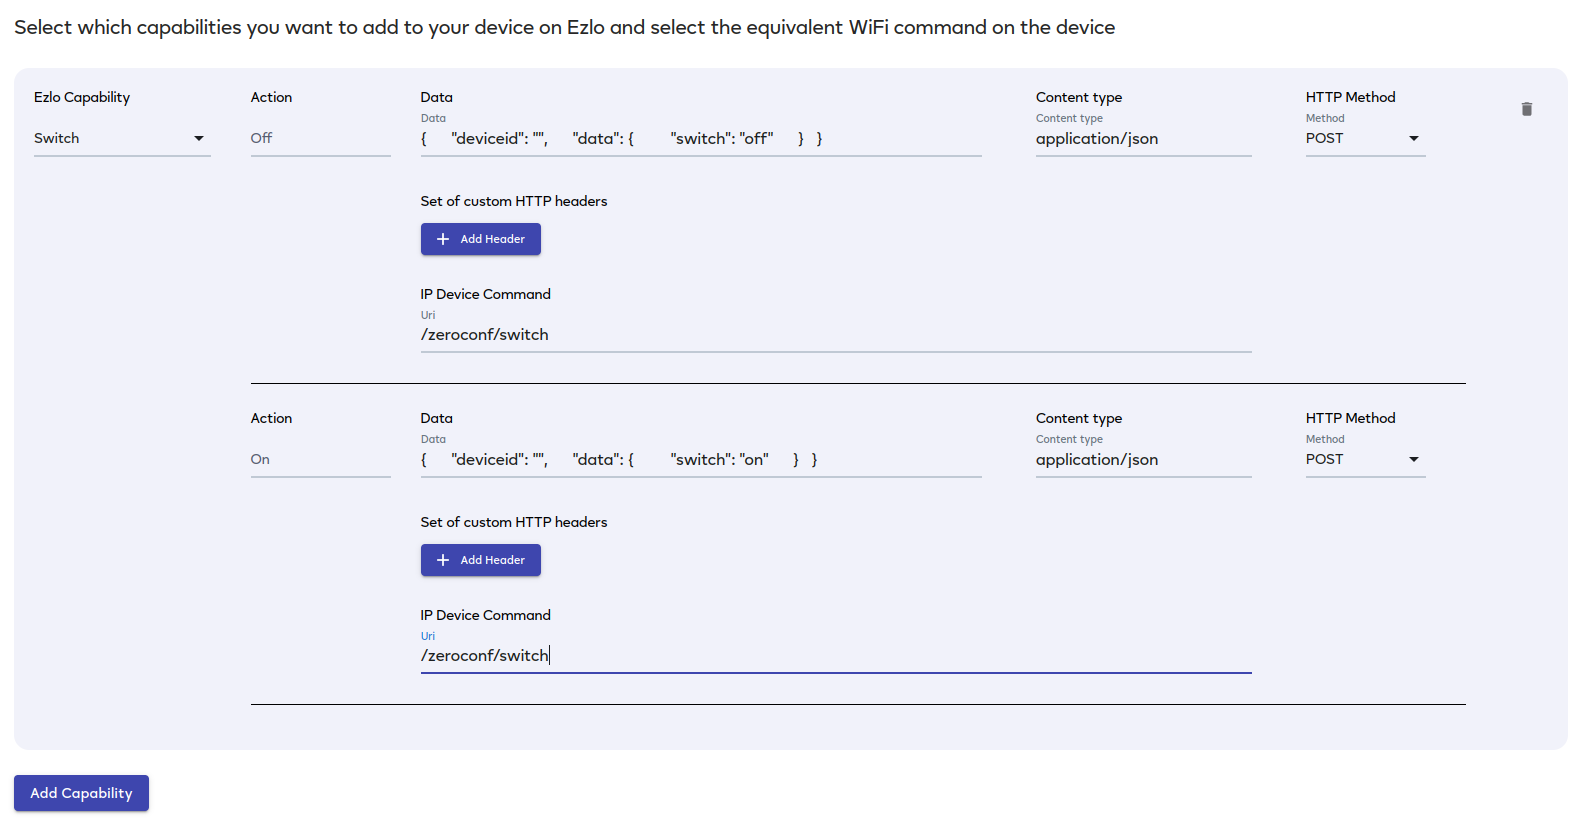
Then on that same page press the “Add Capability” button and select “Switch” from the list. You will then see this:

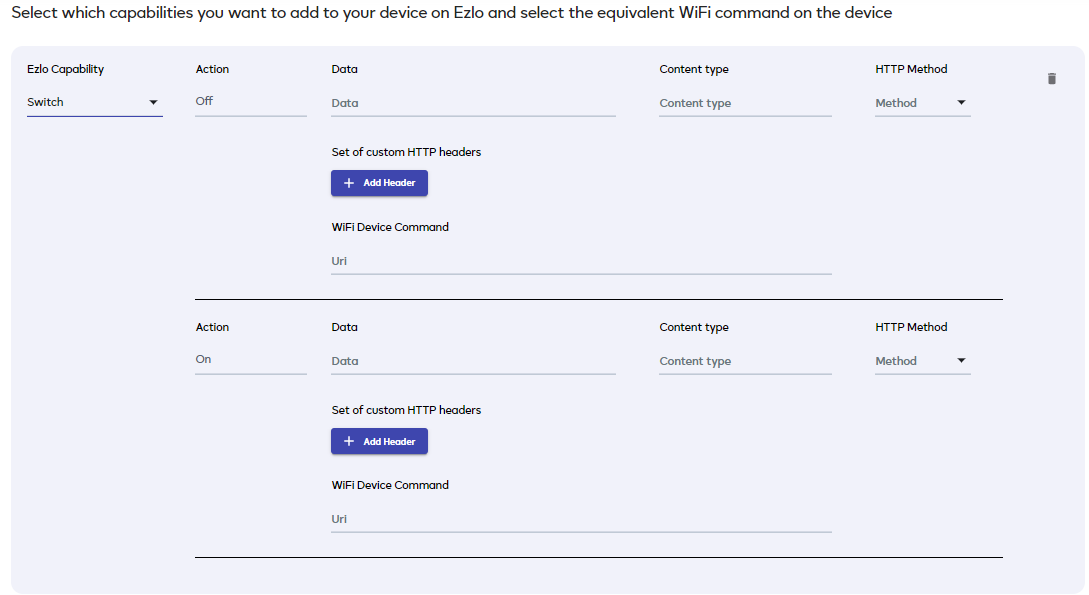
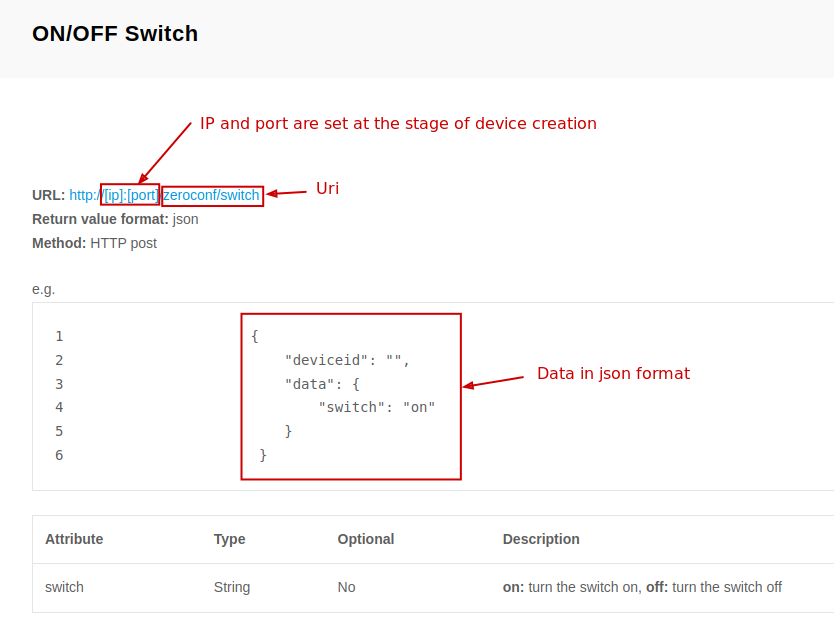
In here we can now start creating our HTTP ON / OFF commands. Select the appropriate “HTTP Method” GET is fine for this example. Do this for both the ON and the OFF.

image

In the URL fields do NOT just paste in the entire HTTP command URL

You MUST only enter in the data portion of the HTTP command at this stage.

For example here are my two HTTP commands and I am only going to copy and paste the part I have highlighted in blue. So everything after http://maker.ifttt.com

Add the ON HTTP command portion in to the ON URL field and the OFF HTTP command portion to the OFF URL field like this.

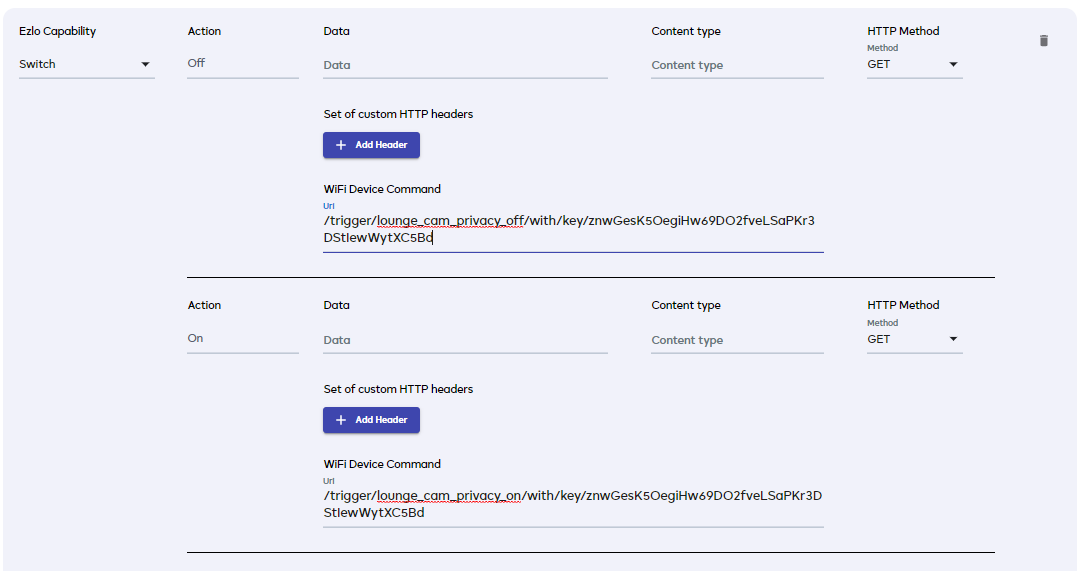
In this simple example I do not need to add anything in to the “Data” fields or the “Content Type” fields, so I have left them empty.

You can now click the “Save Model Template” button at the bottom right of the page.

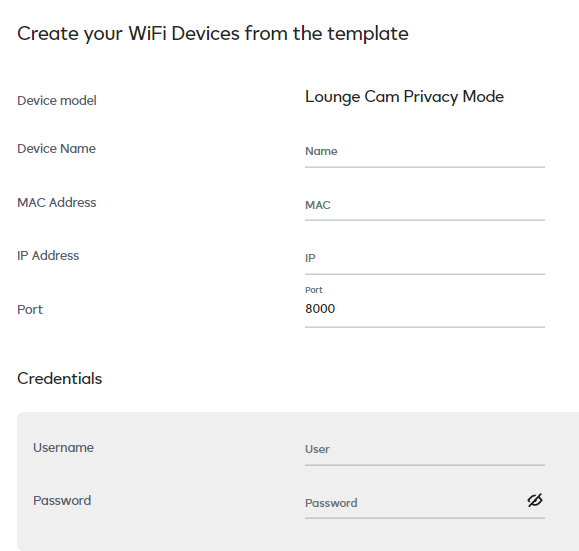
You will then be taken back to this page, press the “Create device” button to now create your virtual ON / OFF switch.

You will then see this page.

Give your virtual switch device a name and fill in the IP and port number fields, like this. Do not enter http:// before the maker.ifttt.com and its port 80.

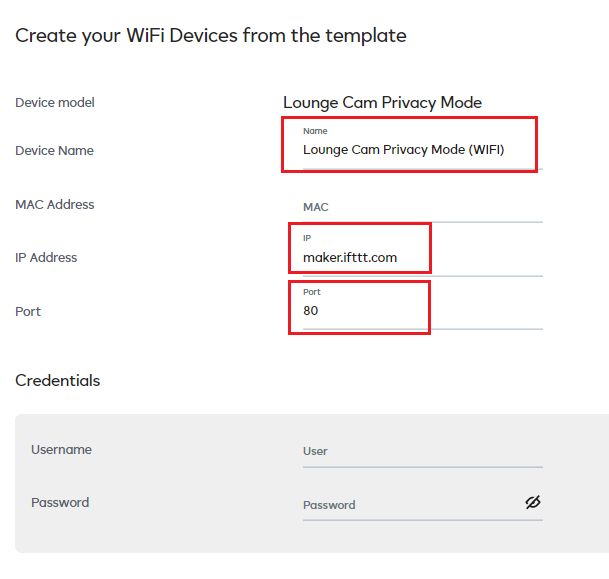
Now press the “Create Device” button.

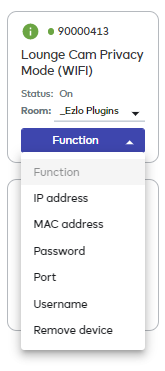
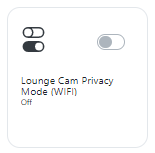
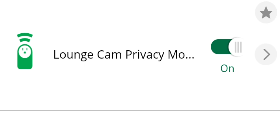
On the main menu on the left you can then go to Settings and Devices and find your newly created virtual switch. In here you can edit its settings, assign it to a room or remove it.

image

To actually control this device and turn it ON / OFF you need to do that either in the Dynamic Dashboard in the web UI or look in your Vera mobile app.

image

image

Your IFTTT ON and OFF applets should now be ran.

You can also setup a WIFI Device Generator virtual switch to control some IP device or an application or service on your own local LAN.

I may add another example to this thread later, for setting up a WiFi Device Generator plugin virtual switch, for directly controlling something on my local LAN, maybe sending some HTTP commands to my local Node-Red installation.

4 Likes

This is a great piece of creative work @cw-kid, welldone!

Wondering how the Data field is used in the Ezlo Capability portion of the IP Device template.

Is it a string of characters that is simply concatenated with the IP Device command string?? Something else? Any examples about how to use it.

On a related topic when you create a device off of your IP Device template there is an option for username and password. How is that used in the string sent with the request? I have been putting my password and user id in the template IP Device Command string, but not sure how to use it here. Any examples here showing how the username and Password is populated into the query string?

Maybe a staff member can answer in more knowledgeable detail, but from what I know just by playing around with the plugin.

The Data portion of the command URL depends on what you are sending your command to?

Obviously different devices and applications and services have different HTTP commands they can accept.

The Data portion is the command payload. For example take a look at how I sent http commands with the IP Device Generator plugin to my Hikvision cameras. In that case I had to send data in an XML payload.

As for user name and password if your target HTTP endpoint requires a user name and password then obviously you need to provide them.

I would say this could be done potentially either way, either by putting them in the Data field along with the rest of the data portion of the URL OR put them into the username and password fields when you create the device via the template. But not both, one or the other.

For example, we have a description of an http request for working with a switch.

In this case, the HTTP request is formed like this:

  1. IP and port are set at the stage of device creation
  2. The rest of the URL is Uri and should be written in the “IP Device Command” section
  3. Data should be written in “Data” section as string
  4. Data in Json format, so we should write the content type “application/json” in the “Content type” section

The end result is like this

About Username and Password, they provide a Basic authorization type and can be replaced with an http header


If your device needs a different type of authorization, it can be added via the header Authorization - HTTP | MDN
In the next versions of the plugin Username and Password will be removed because they are not needed.

More information on the http protocol can be obtained from the official documentation HTTP | MDN

So how would that affect my Hikvision cameras example? As seen on the other thread I posted.

As in that template is entered the username and password for the camera when you do the device creation and I used the username and password fields presented to the user there.

Good example with the JSON didn’t know you could do that !

As I wrote above, Username and Password are basic authorization in the HTTP protocol. A request is sent to the server with a header like Authorization: Basic <credentials>

For "Basic" authentication the credentials are constructed by first combining the username and the password with a colon (aladdin:opensesame ), and then by encoding the resulting string in base64 (YWxhZGRpbjpvcGVuc2VzYW1l ).

Need a little help with how to send the proper HTTP call to an ITACH Flex to Post data to the serial cable (which is talking to a Monoprice Audio tuner).

The Post command looks like this: Global Caché RESTful HTTP API · Apiary

The data I need to send is this:
<16PR00\r

with the \r needing to be sent correctly as hex or the propper ASCII number for a carriage return or ‘CR’. Using their Socket call from the iTach Flex it just does the right thing if you send “<16PR000\r”, but I can’t figure out how to use the restful HTTP call instead (since the Ezlo doesn’t support sockets) there are several tips on line how to do this, but I can’t seem to make any of them work.

if you can help me figure out how to get that \r properly sent as HEX or any other ideas that would be great (this is the monoprice documentation 10761_Manual_131209.pdf (monoprice.com) page 16 has the serial commands you send) but my problem is with the Flex and getting the right string sent on the serial cable using the restful HTTP API.

Then I could use this plug into to control my Monoprice (via the iTach Flex) like I do today from my Vera.

Feature suggestion

IP Devices which are polled by the gateway show the result of the last successful poll. If the device is disconnected for days the gateway will still show a days old result which can be misleading.

I suggest there is some sort of aging aspect to the IP Devices. If say the nth poll in a row fails a reply the results are deleted and shown as n/a or unreachable in the device summary. You could just pick what n should be or make it user configurable. Alternatively you could have an aging timestamp. If the result is older than x hours then it is deemed void and shown as n/a or unreachable.

A knock on feature might be to back off the polling routine in the event of multiple poll failures so as not to clutter the LAN/WiFi with useless traffic. Perhaps akin to IP traffic exponential back-off. Then if a poll is successful it reverts back to the set polling interval.

Anybody has a sample of using the volume control of a http A/V device?

Regards

@osman maybe able to answer this question?

Regarding the IP Device Generator plugin formally named Wifi Device Generator, the only templates for devices types that were working were for basic devices like Switches and Dimmer Lights.

I am not sure if the other device types / templates were functioning?

I’ve only ever created Switch devices using this plugin.

It depends on the capabilities

It means we have switch and power capabilities where you can send any http request to any endpoint when you turn a device on or off. so you will have two options there.
We also have dimmer, where you can send the dimmer level
In others it is a get function where you only pull data from outside.

So if you want to control A/V commands, for now you can bind them to switch capability for example to just send two commands.
For other commands we need to add that functionality to plugin.