Hello everyone,
We created a guide on how to create an EzloPi AC Lamp setup with Relay interfacing.
NOTE: Before moving into this example it is very necessary to know about device registration,
provisioning, and converting the ESP32 device into an EzloPi device along with knowledge of
Ezlogic desktop app. All this information can collectively be found in an EzloPi User manual document.
General information and the users manual for EzloPi you can find in this thread: EzloPi - Introducing our brand new Open Source project - for ESP-based devices
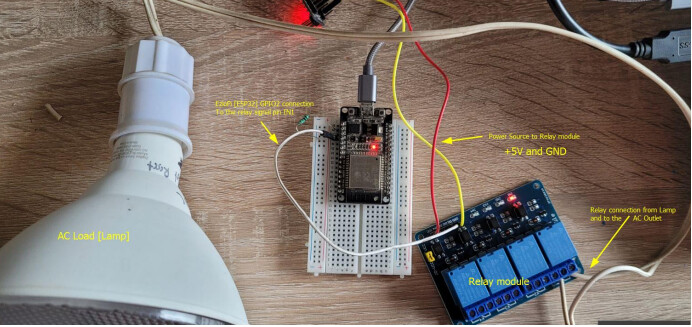
1 Relay circuitry and lamp circuit setup.
For interfacing and controlling the lamp we will be needing following components:
- An AC lamp with lamp holder and wires to connect to AC mains.
- ESP32 device for converting it into EzloPi smart device
- An properly designed relay module
- Power source for ESP32 as well as a relay module
The wiring diagram can be represented as follows:
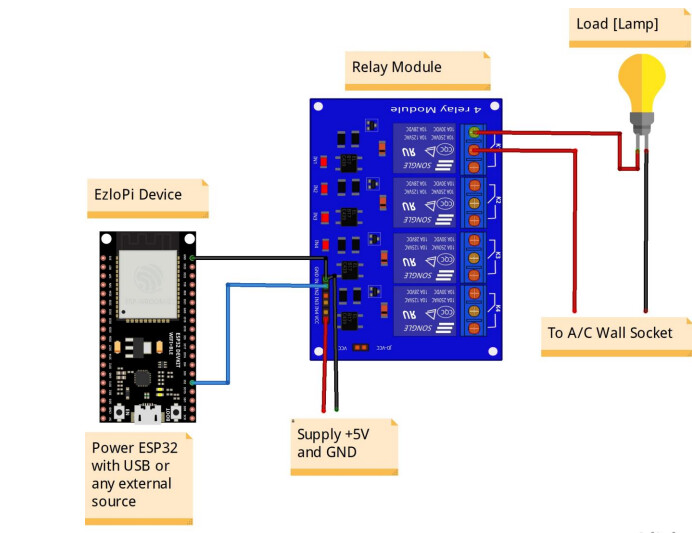
In the same way connection of the components has been made as:
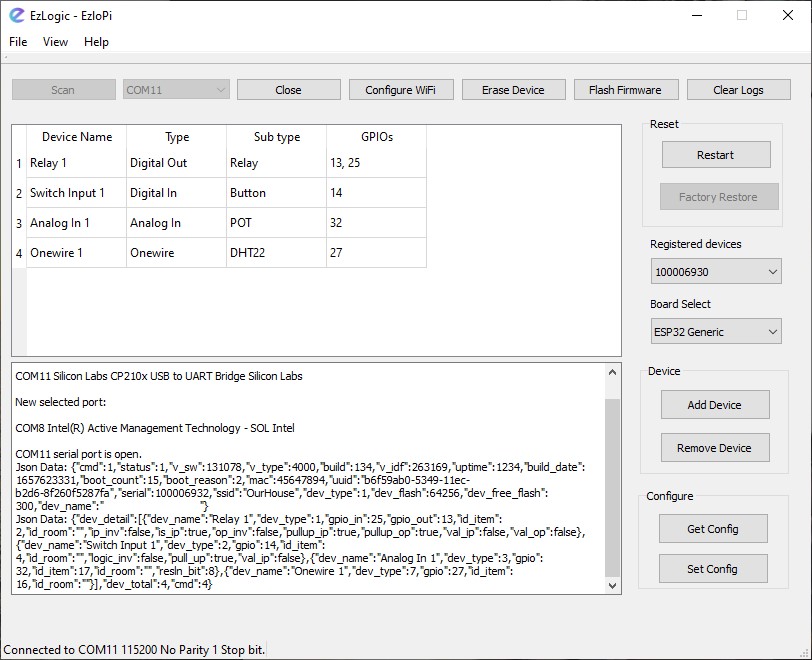
2 Interfacing a relay for an AC LAMP using Ezlogic Desktop app:
Note that before moving to add any device it should the new device added and should be able
to access from the mobile app.
Also, note that we will be adding the Relay under EzloPi serial 100004031.
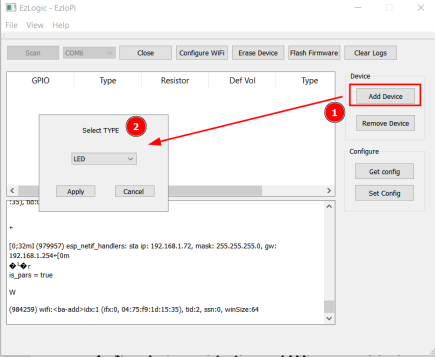
Device addition will be started with the button Add device in the UI as above. From the dropdown
shown at 2 select LED at the moment since the LED option can be used for toggling the GPIO which
works for triggering the relay.
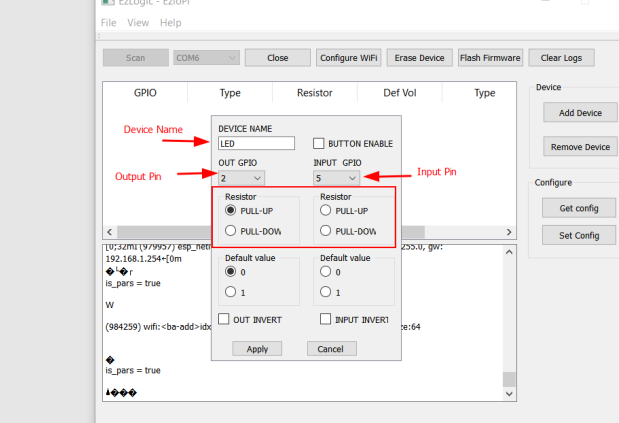
Select Output pin for LED, its 2 at the time. Pin 2 at output means RELAY is expected to be
connected at GPIO2 of ESP32 and the same pin will be controlled via mobile APP. The button can
either be enabled or disabled. Upon enabling the button user will have an extra control facility with a
button connected at GPIO5.
After a LED has been configured and pressed the Apply button we get this device added to the list.
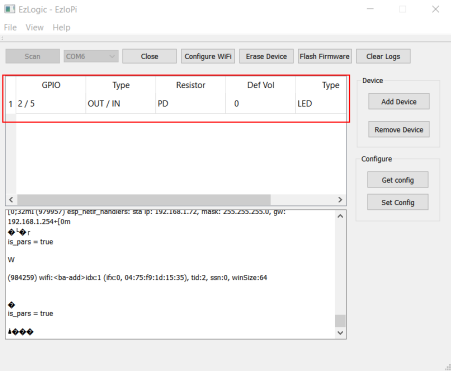
After it, we write this GPIO configuration to the ESP32 (EzloPi) device connected to the PC with
pressing Set Config Button and after the update has been written we will get the success message
as
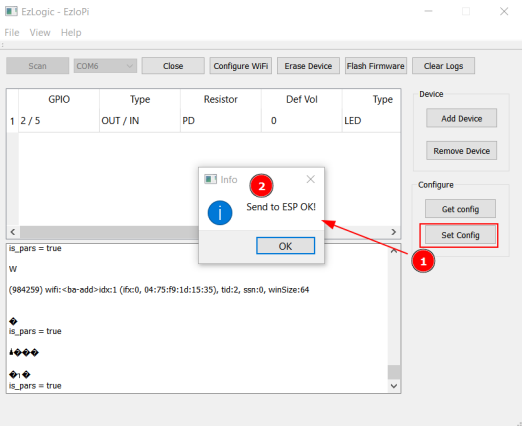
**Note: After configurations have been set to the device please reboot the ESP32 **
device
Now the relay has been added and it will automatically be updated in the device with the ID we
registered as following section 6 of the user manual titled “Interfacing a device” and can be
visible in the app as a LAMP as shown below on the device’s dashboard of the app.
Before that let us move forward knowing about the app.
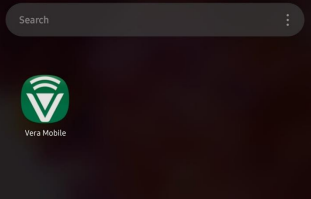
3 Vera Mobile app
You can download the Vera android and iOS apps from the respective store by searching for Vera Mobile.
iOS App: VeraMobile™ on the App Store
Android App: https://play.google.com/store/apps/details?id=com.vera.android
Install the app and open it.
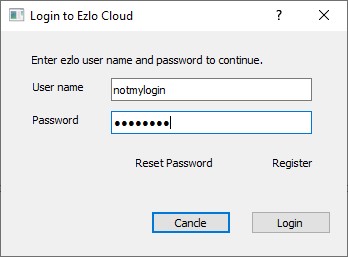
Create a user account if you already do not have an account or log in if you are already a user.
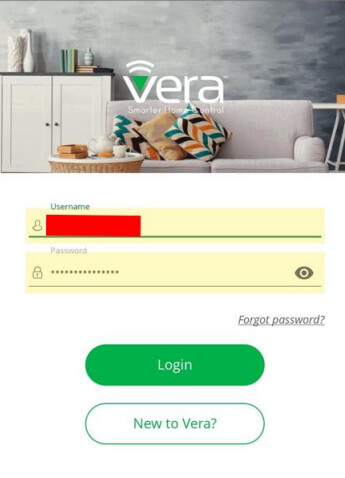
The device added explained in section Error! Reference source not found. of user manual titled
“Registration of a new EzloPi device into Cloud and provisioning the device” will appear
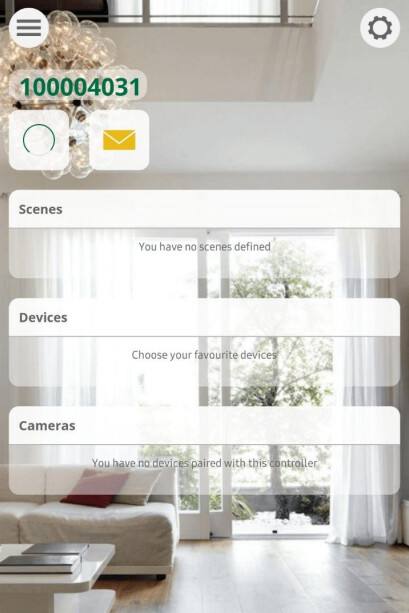
after getting logged in to the app as below:

Tap into the device for entering into the device dashboard. You will see your dashboard as:
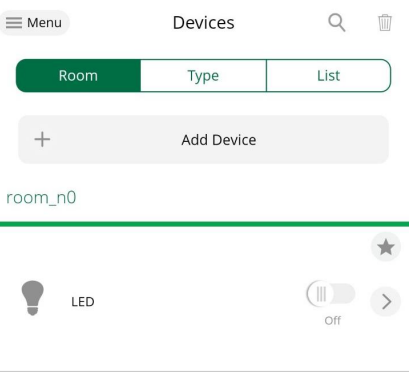
For checking the device that has been just added you can navigate to the devices list from the menu
as
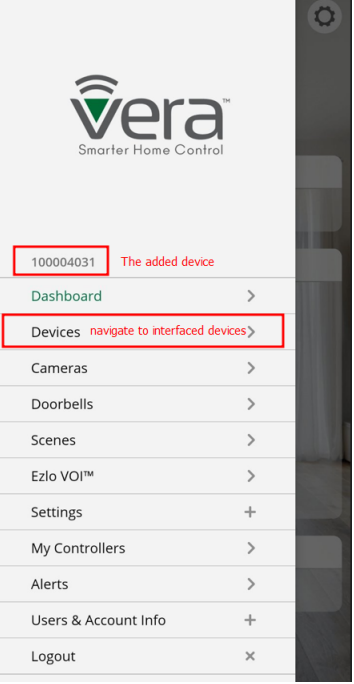
The added device will appear as:

This is the device that has been added as instructed in section 2 of the user manual titled as
“Interfacing a device”.
We can control the device from this UI itself or we can also add it to the dashboard shortcut for
easy access and status.
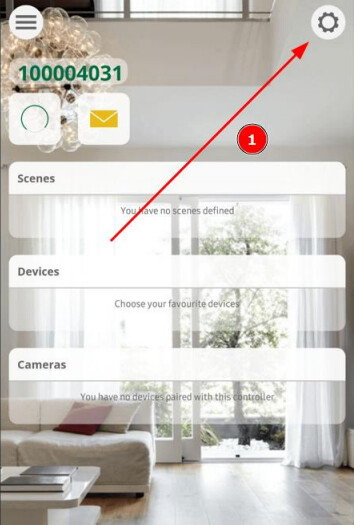
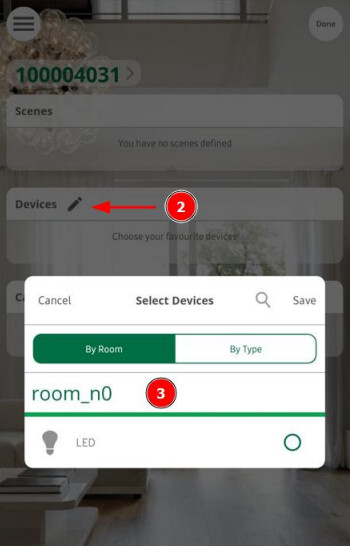
For such, we can add the device into the dashboard shortcut as:
- Navigate to the setting in the top right corner of the app
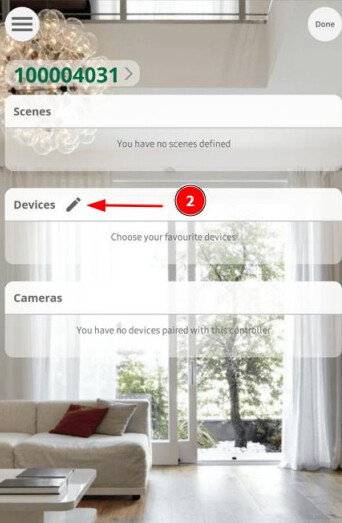
- Press an edit button on the device widget
- A new dialogue will appear with all the interfaced devices. Currently, we have only one
device in the name LED. Select the device checking the radio button on the left to the
Lamp icon and press save. This will close the dialogue and you will see the lamp being
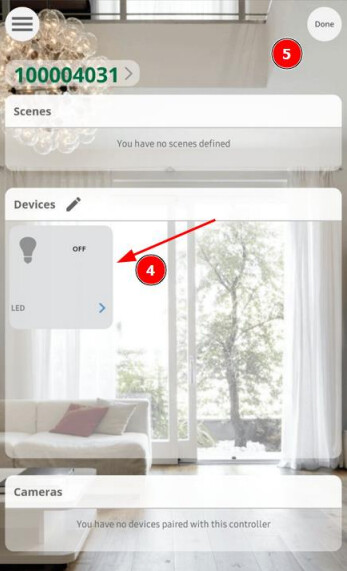
added in the dashboard widget shortcut.
- After it, press “Done” as shown in 5 and now this process completes.
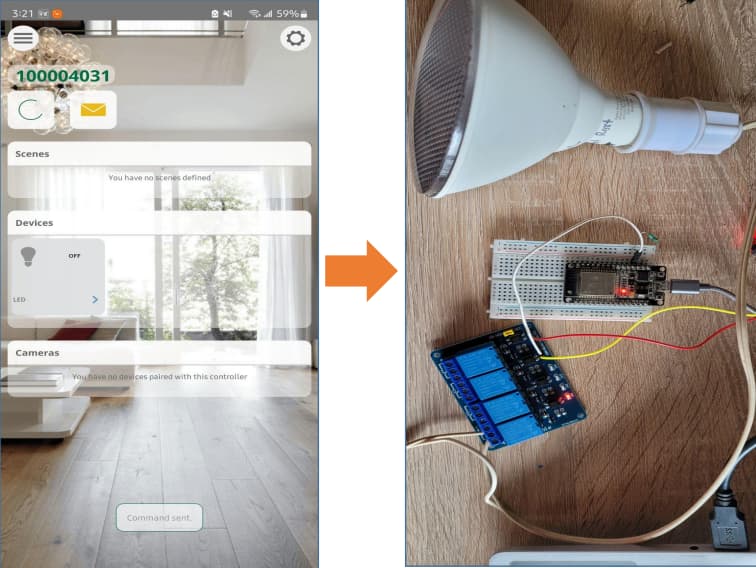
4 Controlling the lamp from the app:
Now we have completed all our setup and can control the lamp using the mobile app wherever we
are located at.
With the dashboard shortcut as mentioned in section 3, we can just press the icon for toggling the
state of the device. If the device status is off the Lamp turns OFF and if the device status is ON in
the dashboard icon the Lamp status will be ON in real-time.
Turning ON the lamp:
If you tap on the lamp icon as shown below, the icon changes with an indication of a glowing lamp and
so does the hardware lamp in real-time. In other words, power is connected to the lamp by triggering
the relay interfaced to the EzloPi hardware device.

Turning OFF the lamp:
If you tap on the lamp icon as shown below, the icon changes with an indication of a non-glowing lamp
and so does the hardware lamp in real time i.e. turns off or in other words power is disconnected
by triggering the relay interfaced to the EzloPi hardware device