Example MSR rule to bridge back a device from an Ezlo hub to a Vera hub for Home Remote dashboard

I setup this rule today in MSR and a virtual Humidity Sensor on my Vera Plus. I have a real Humidity sensor device (Zigbee) paired to my Ezlo Plus.

But as Home Remote dashboard app does not support Ezlo hubs and I wanted a tile showing the Humidity value, the device has to come from the Vera hub into the Home Remote Designer etc.

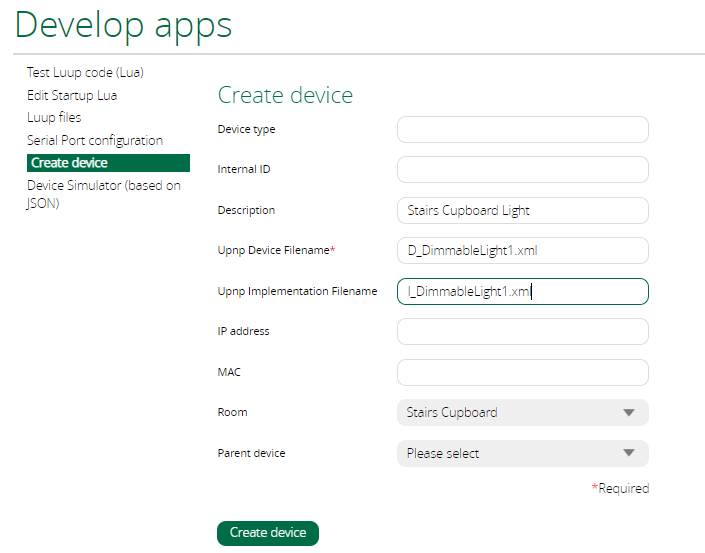
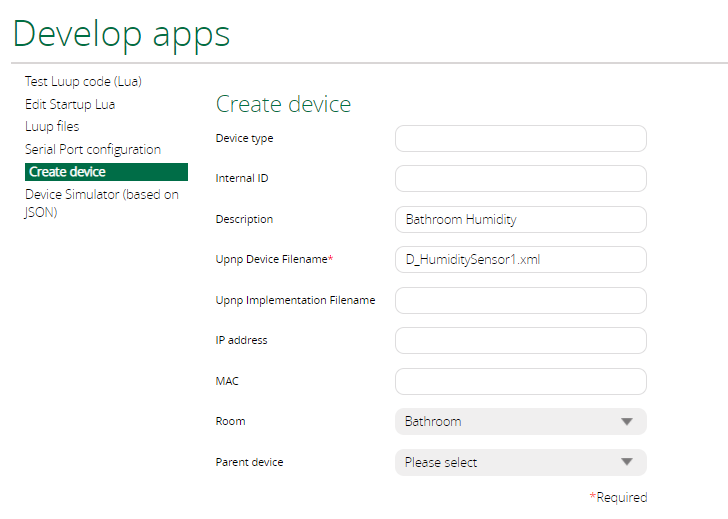
First step was to create a virtual Humidity sensor device on my Vera Plus.

Use D_HumiditySensor1.xml as the Upnp Device Filename.

Once I could see the device in the Vera UI7 web GUI (Do not reload the Luup Engine at this point) I went in to its Advanced area Params tab and put this in the device_json field:

D_HumiditySensor1.json

Then on the “New Service” tab, I create a new variable on the device for “CurrentLevel” and then I restarted the LUUP engine.

image

New Service = urn:micasaverde-com:serviceId:HumiditySensor1
New Variable = CurrentLevel
New Value = 10

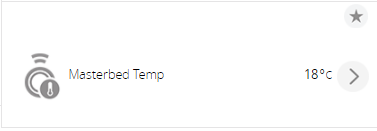
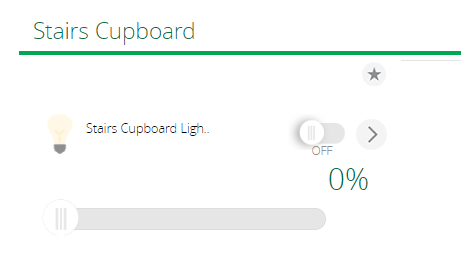
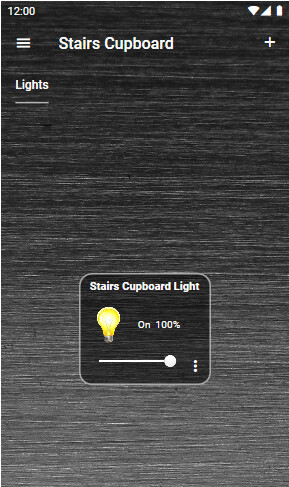
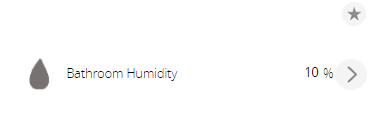
I then had a virtual Humidity sensor device that looked like this:

image

Next I Restarted MSR so it would find this new virtual device on the Vera Plus hub.

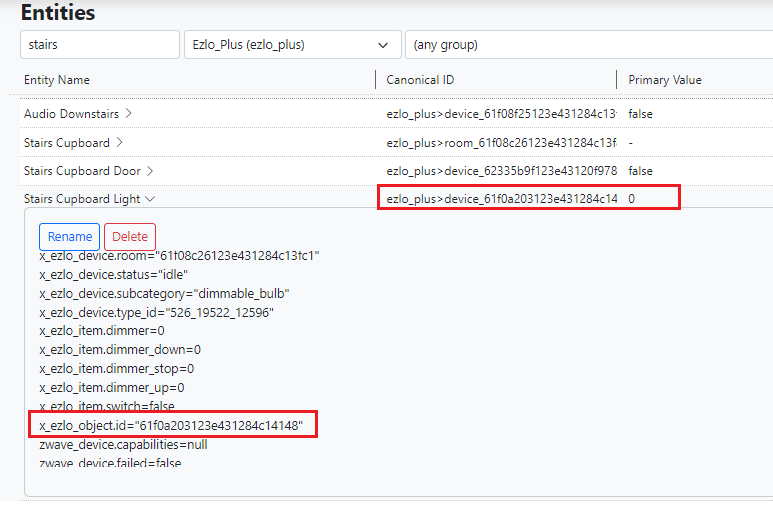
In the Entities area of MSR, I then found the real Bathroom Humidity device off the Ezlo Plus controller and made a note / copied the items highlighted in red as seen in the below screen shot, the devices ID number and the attribute for the value.

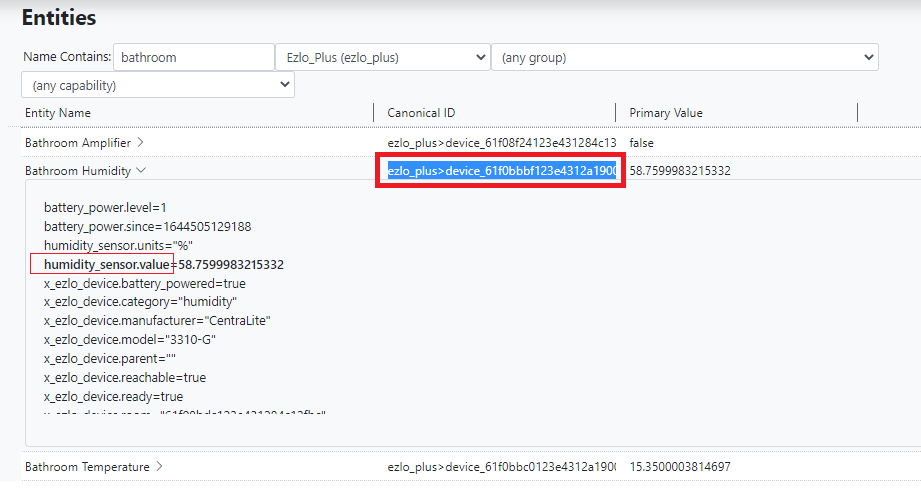
I will need these later to build my expression code.

ezlo_plus>device_61f0bbbf123e4312a1900a18

humidity_sensor.value

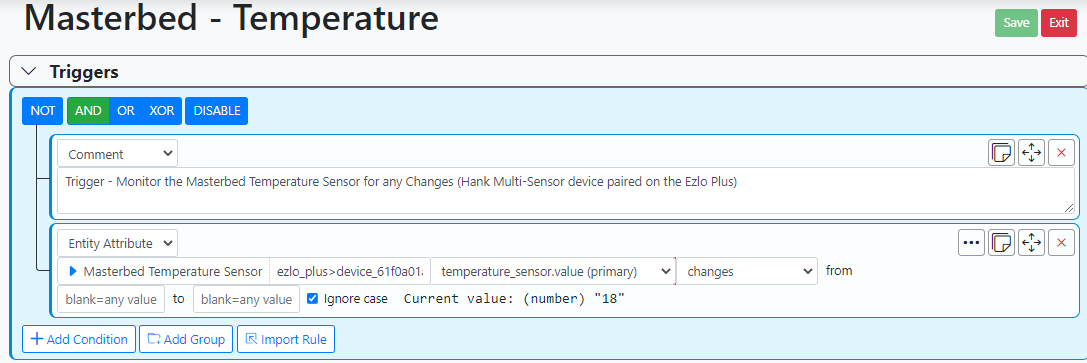
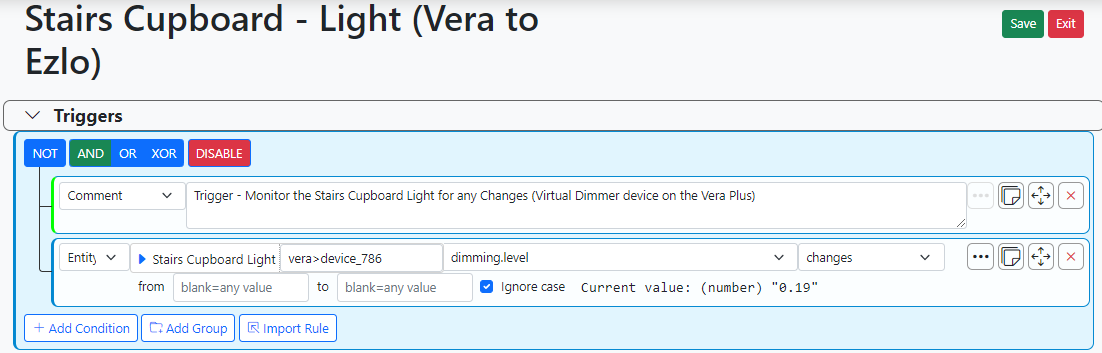
And I then started creating my new MSR Rule.
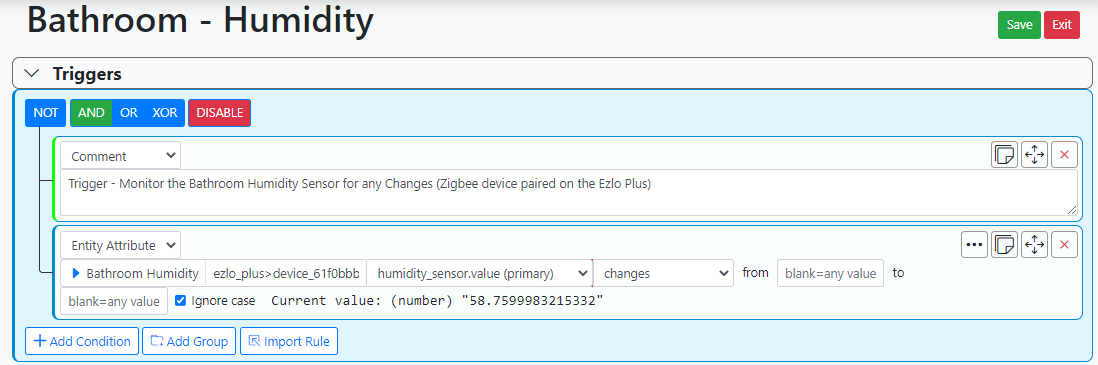
Triggers:

I selected an Entity of the real Humidity sensor device off the Ezlo Plus controller and “Changes” from any to any.

I then created a new local expression in the rule called “BathroomHumidity”

Using this expression code:

round (getEntity( 'ezlo_plus>device_61f0bbbf123e4312a1900a18' ).attributes.humidity_sensor.value,1)

Note: Ensure that the MSR rule is enabled at this point or the expression won’t compute and show any value.

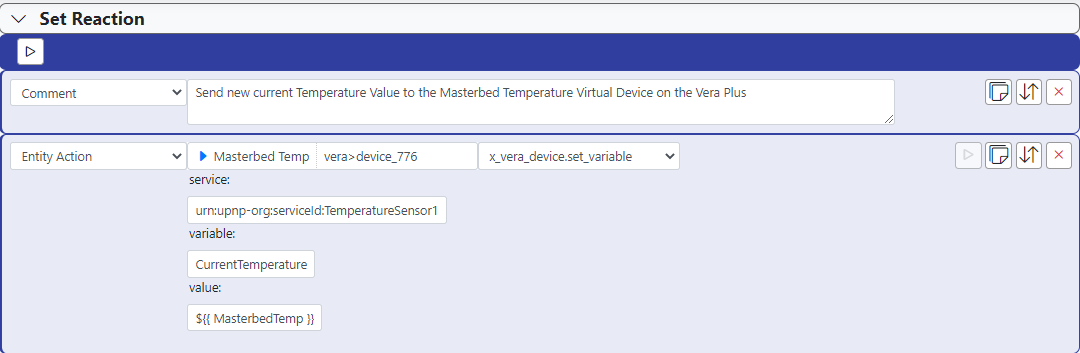
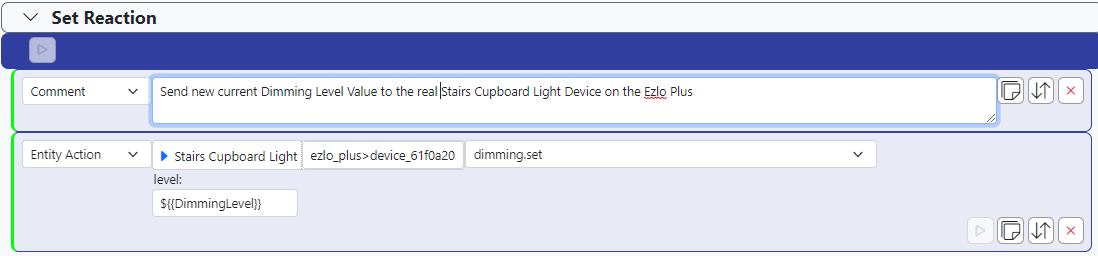
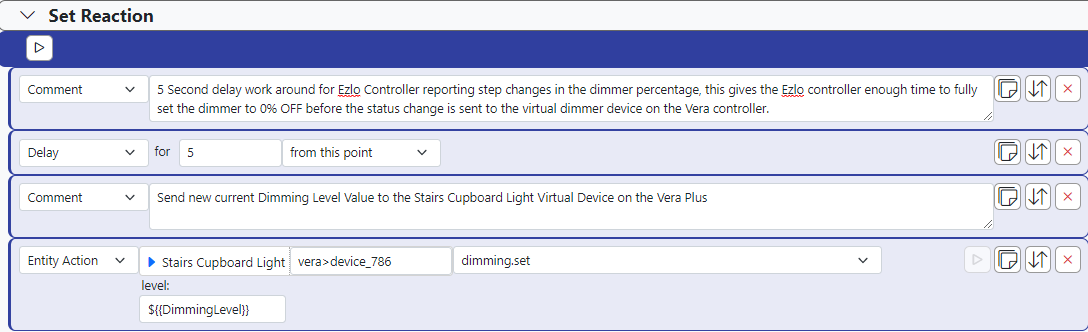
Next in the same rules Action we need to send this Humidity value to our virtual Humidity sensor device on the Vera Plus.

Service = urn:micasaverde-com:serviceId:HumiditySensor1
Variable = CurrentLevel
Value = ${{ BathroomHumidity }}

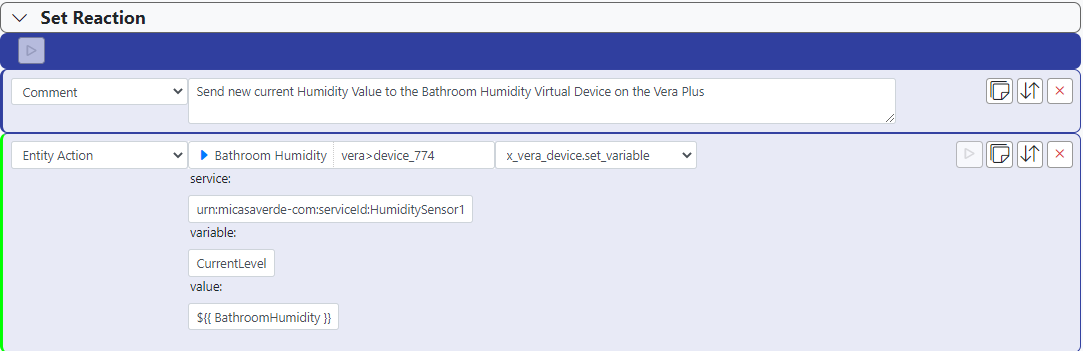
Note: Device ID 774 is the “Bathroom Humidity” virtual device on the Vera Plus.

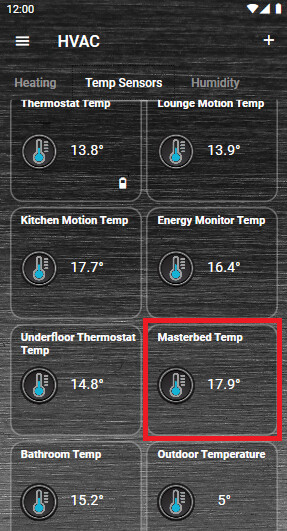
That’s it save your rule and hit the reset button and the data with the actual Humidity value, should then be sent to the virtual device on the Vera hub.

image

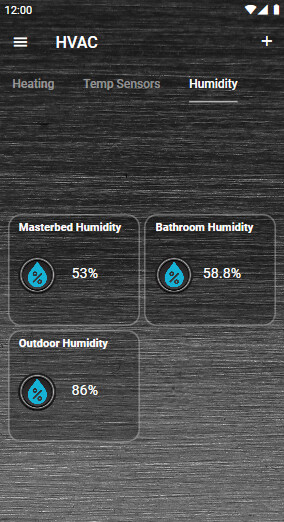
You can then in the Home Remote Designer “Synchronise Devices” on the Vera hub object and add your new Humidity sensor device on to a tile on your dashboard page.

I have also done this with a Zigbee Temperature sensor device that is paired on my Ezlo Plus.

Its a bit clunky and not ideal, but its like a backwards Ezlo to Vera “bridge” and is OK to use if you just have a few real devices paired on your Ezlo hub, that you want to also make appear on your Vera hub / Home Remote dashboard etc.

  • Thanks to Crille for a little help on the other forum with the expression code and “round”.

If you want to do a Temperature sensor:

Upnp Device Filename: D_TemperatureSensor1.xml when creating the virtual device.

In the Params tab:

device_json = D_TemperatureSensor1.json

New Service tab:

New Service = urn:upnp-org:serviceId:TemperatureSensor1
New Variable = CurrentTemperature
New Value = 10

Example MSR expression code, change it to your devices ID number:

round (getEntity( 'ezlo_plus>device_61f0a01a123e431284c1413d' ).attributes.temperature_sensor.value,1)

Virtual Device on the Vera hub:

image

Example MSR rule for Temp sensor:

Triggers:

Local Expression:

Action:

Home Remote:

What about a device that would need two way comms ?

For example I have a Z-Wave Light bulb paired to my Ezlo Plus controller and I’d now like a virtual device on the Vera Plus controller / Home Remote app, to reflect the real device.

So I add a new virtual Dimmer Light on my Vera Plus.

On the Params tab of the new Virtual Device you should have these present in the fields:

device_type = urn:schemas-upnp-org:device:DimmableLight:1

device_file = D_DimmableLight1.xml

device_json = D_DimmableLight1.json

impl_file = I_DimmableLight1.xml

(Note - you may need to upload this impl file to your Vera controller via Apps - Develop Apps - Luup Files. Its attached, unzip it first.)

I_DimmableLight1.zip (602 Bytes)

image

Then in MSR Entities list, I found the existing real Z-Wave Light bulb device and made a note of its device ID:

61f0a203123e431284c14148

I then created a new MSR rule (Ezlo controller → Vera Controller)

Trigger is the real Z-Wave Light bulb device on the Ezlo Plus and if its dimming level “changes” from anything to anything.

I then created a new local expression within the rule named “DimmingLevel”

This is the example expression code, I inserted the device ID of the real Z-Wave Light Bulb off the Ezlo Plus controller, I noted earlier.

(getEntity( 'ezlo_plus>device_61f0a203123e431284c14148' ).attributes.dimming.level)

I then added an Action in to the MSR rule, I selected the Virtual Dimmer device off the Vera Plus controller (ID 786) the action should be dimming.set and the level should be the name of the expression like this ${{DimmingLevel}}

I then saved the rule and tested by changing the dim level of the real device on the Ezlo Plus hub and seeing if the dim level on the virtual dimmer device on the Vera Plus was also now changed to that same current level and it was.

The ON / OFF buttons also worked and change the virtual dimmer device also.

Now this is only currently one way Ezlo controller → Vera controller.

If I use the virtual dimmer device on the Vera Plus and start controlling the diming level on that device, then the real device on the Ezlo Plus is not currently controlled.

So I needed to add a second MSR rule. Vera controller → Ezlo controller.

(Wasn’t sure if I could do all this in just one MSR rule).

Trigger is the Virtual Dimmer device on the Vera Plus dimming level “Changes” from anything to anything.

I added an expression with this code, device ID 786 being the ID of my virtual dimmer device on the Vera Plus.

(getEntity( 'vera>device_786' ).attributes.dimming.level)

And for my Action I selected the real Z-Wave Light Bulb device off the Ezlo Plus controller with dimming.set and the level is the expression name like this ${{DimmingLevel}}

Now when I control the virtual dimmer device on the Vera Plus controller the real Z-Wave Light Bulb device on the Ezlo Plus controller is also controlled.

So its now two way !

Here are the two rules in the rules list in MSR:

image

This is all a bit clunky but it does work and I have now got the light that is directly paired to the Ezlo Plus controller also working on the Vera Plus controller as a virtual device. So now I can add it into the Home Remote dashboard app.

image

Obviously this would be a ball ache to do for lots of devices if you have all your devices paired to an Ezlo Plus controller, but if you just have a few real devices paired on the Ezlo Plus controller then this solution might be OK.

Ideally I’d like a reserved bridge plugin Ezlo Controller to Vera Controller.

We do currently have @reneboer Vera Controller to Ezlo Controller bridge plugin here which works well.

And I’ve documented what I’ve done here today, so I remember how I did it in the future.

UPDATE:

There is a problem with this logic as the light paired to the Ezlo Plus hub doesn’t go straight to 0% when you press the OFF button. There is some “middle step” that happens for some reason. Ezlo say this behaviour is normal.

However this “middle step” does not happen with lights on my Vera Plus.

I did the following tests from the light being OFF to begin with.

Moved Dimmer Slider to 100% Pressed the OFF button. It then jumped to 66% before going to 0%

Moved Dimmer Slider to 50% Pressed the OFF button. It then jumped to 17% before going to 0%

Moved Dimmer Slider to 74% Pressed the OFF button. It then jumped to 41% before going to 0%

The end result is the light is turned back ON when I expect it to have been turned OFF and to have remained OFF.

UPDATE 2:

So the work around for the Ezlo Controller reporting dimmer steps when the light is being turned OFF, from its current dim level going down to 0% is to add a delay in the Ezlo → Vera rules action.

This gives the Ezlo controller enough time to fully turn off the light and set it to 0% The current OFF status is then sent after the delay, to the virtual dimmer device on the Vera controller.

This prevents the other Vera → Ezlo rule turning the light back ON again, as it was picking up on the middle dim level step and causing the light to turn back on when you expected it to remain off.

Its hacky but I now have two way comms and control of a dimmer light on the Vera controller / Home Remote dashboard app, that is actually paired to the Ezlo controller.