Well, what I think @shallowearth is intending to do is have a single “dimmer” that represents volume for all stations in his whole-house audio system. Dimmers fire events when their brightness changes, and this in turn could trigger a scene, Reactor, PLEG, etc. to set the volume in each of his rooms to the same (or perhaps a trimmed/balanced) level. You can do the same thing with a group of lights–one (virtual) dimmer controls them all.
1 Like
In the professional lighting world, this is called a submaster or group master function. It will be extremely useful.
1 Like
OK. Install the Github stable branch version, if you dare…
- Go here: GitHub - toggledbits/Switchboard-Vera at stable
- Click the green “Clone or download” button and choose “Download ZIP”
- Save the ZIP file somewhere.
- Unzip the file.
- Upload the contents of the unzipped
srcsubdirectory to your Vera using the uploader at Apps > Develop apps > Luup files. Do not upload the files in theopenLuupsubdirectory. Before uploading, turn off the “Restart Luup after upload” checkbox, until you get to the last file; turn it back on for the last file. - Hard-refresh your browser.
@rigpapa whats new in that version? ![]()
So currently, I am using just an on/off switch for each speaker set and then controlling the volumn with scenes because I couldn’t get a virtual dimmer that worked correctly (the Vera “sample virtual dimmer” has bugs like auto turning the switch off when you brighten to 100%… sheesh). But yes, I would use the Virtual Dimmer to create a trimmed out volumn control for my speakers, some of which need to be groups some of which need to be independent.
I also know there is demand for wanting to control multiple dimmer switches at one time, using a device instead of having to create scenes to do that.
That stable branch release:
- revises the UI so that both the control/configuration and creation of new virtual switches is done on a single control panel tab rather than two;
- this facilitates having a UI to create tri-state switches, rather than having to fuss around in the device’s attributes (which is error-prone) to convert a previously-created binary switch into a tri-state switch.
- adds a virtual dimmer as a device type, so the UI can now create three different switch types: binary, tri-state, and dimmer.
- item #1 sets the stage for introducing other switch types more easily.
I’ve already had a discussion with another Vera community user, @HSD99, who is an expert on theatrical lighting systems, about separately making a plugin to make a virtual dimmer behave as a submaster (HPT, LPT, inhibit, etc.), to control groups of lights from a single dimmer. He and I worked together previously on my Yeelight plugin adding filter color selection capability to that plugin (his suggestion/expertise), although I approached it agnostically so that it will do it for any installed RGB light, not just Yeelight. It seems possible/desirable that that feature, too, would work its way into the submaster plugin. But this level of functionality is separate and distinct from the role of Switchboard (but it may/should be Switchboard-compatible).
1 Like
Just tried out the dimmer. So far… looks awesome. It even keeps the previous dim level when turning On… which is perfect for controlling a speaker because I want it to come on at the previous level not 100%! Now just need to hook up the controlling logic and try it out.
1 Like
is this recognized as a device in alexa to trigger voice announcements?
Yes, all three types show up in Alexa correctly (binary, tri-state, and dimmer)
1 Like
Hi, for some reason it’s refusing to work on my Vera. The app installs but it tells me ‘ERROR: Device not ready’ when I try to add a device. I’ve created the device manually as well using the GitHub files but I get the same error.
Working now, after I restarted the box twice.
I would do the following:
- Delete the Switchboard master device(s).
- Reload Luup.
- Hard refresh your browser (CTRL-F5 for Chrome/Win, SHIFT-F5 for Firefox/Win, CMD+SHIFT+R on Mac)
- Uninstall the plugin.
- Repeat steps 2 & 3
- Reinstall the plugin.
- Wait for the install to complete, which may take several minutes.
- Repeat steps 2 & 3 again.
- Go into the Switchboard master device and add a virtual switch.
- Repeat step 3.
IMO, any time you add, delete or change the name or room assignment of any device, or install/update/uninstall any plugin, you should hard refresh your browser. This often solves many device issues that occur around these operations.
1 Like
Can I configure the switch to momentarily?
I want to use it to start Scenes. And I don’t want to write a Scenes to start one and turn it OFF
Yes, on the config tab of the master device there’s a little clock icon on the same row as each virtual switch. Click that and enter your reset time.
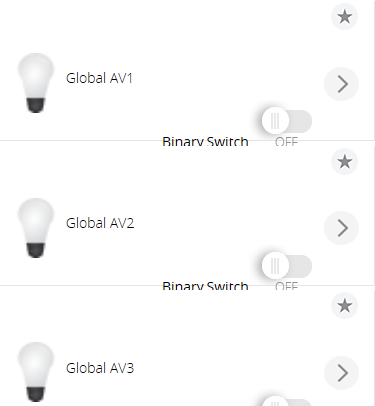
Switch all my virtual switches over to switch board. Had some use for the Tri-switchs as well. Works great but there is some truncation going on, see attached.
I am currently testing out MQTT subscribing and publish commands with virtual switches. This functionality may exist somewhere else, but I wonder if the Switchboard Virtual Switch can behave as a binary MQTT switch. Essentially it would have 2 functions.
-
State Update switch status - A specific topic subscription would define the state, for a switch type devices it would be based on a number response of 0 or 1 on a topic query. So if another device sets the remote device and the broker updates with new state, the virtual switch would reflect that automatically.
-
MQTT publish with 2 settings that can be specified which correspond with specific MQTT commands to set on or off on a topic specified in the variables.
I have set up a Virtual switch with the MQTT plugin at the parent device. I can specify a single MQTT topic to subscribe to and have the switch update status, however have not seen a simple way of having the switch actually send a command when triggered as well.
I’m not really that familiar with MQTT and less so with the MQTT Client Plugin. I think you should post your question/objective in the MQTT Client Plugin topic, and see what those wizards come up with.
Is anyone using the virtual dimmer in combination with Reactor to control volume on multiple Yamaha AV Receiver zones? The issue I see is the Yamaha receivers commands are in dB levels instead of a sliding scale of 1-100. I use a remote app that works with the Yamaha that has slider settings i.e. min 0 max 100 so was thinking there must be some kind of conversion of logic to make it work.
To do the math you need to figure out the dB range you want.
For example if you want -60 to -25.
That is 35 steps.
So the math for 99% would be
(99*.35 - (99*.35 mod 1)) - 60 = -24
In that equations 99 is the percent value from the dimmer.
.35 is the number of steps you want divided by 100 aka 35/100
subtracting (99*.35 mod 1) coverts the decimal to an integer changing 34.65 to 34 (basically just cuts off the decimal values and ensures you always have a whole number)
Then subtracting 60 is the lower end of the range and coverts it to dB
depending on what you are using to do the math you may need the “mod” function or use “%” to do the mod function. I haven’t tried doing it in Rector yet, but have done it in LUA.
Hope that helps.
Thanks I discovered that both the yamaha plugins I have used in the past. (currently using HTTP plugin) don’t seem to respond to discrete volume commands. Just the step up/down commands work so without that I may have hit a dead end. The GET value for volume dB levels works though.
Then just calculate how many step downs or up you need to make when the dimmer value changes, and send that many through.